Ingenious Methods to Drywall Installation in Edmonton
Wiki Article
Professional Guide to Drywall Installment: Tips and Methods for a Perfect End Up
Drywall setup can be a challenging task for even the most skilled do it yourself fanatics. The procedure needs accuracy, interest to detail, and a comprehensive understanding of the strategies included in attaining a perfect finish. From picking the right tools and materials to preparing the surface area and performing specific dimensions, each action plays a crucial duty in the total end result. In this expert overview, we will certainly explore the pointers and methods that experts advocate to make sure a perfect finish. Whether you're a seasoned pro or a novice seeking to tackle your initial drywall task, this overview will supply you with the expertise and insights needed to accomplish professional-grade outcomes. Let's dive right into the world of drywall installation and find the secrets behind a perfect surface.Tools and Materials Needed
To ensure a reliable and smooth drywall installation process, it is crucial to have the necessary tools and materials conveniently available. Having the right tools not only saves time however also ensures a professional surface. The complying with are the fundamental tools required for a successful drywall installment:- Determining and Noting Tools: A gauging tape, chalk, and degree line are necessary for straight lines and accurate dimensions. These tools help make certain that the drywall is set up uniformly and straightened with the bordering wall surfaces.
2. Cutting Devices: An utility knife is the key tool for reducing drywall panels. It is very important to have a sharp blade to achieve exact and clean cuts. Furthermore, a drywall saw or rotary tool might be needed for cutting holes for other components or electric outlets.
3. Securing Devices: Drywall screws or nails are made use of to protect the panels to the studs. A screw weapon or power drill with a screwdriver little bit is vital for promptly driving in screws. A hammer can be utilized for nail installment.
- Insulation and Completing Tools: Joint substance, a taping blade, and an edge device are used for taping and finishing the joints in between drywall panels. A fining sand block or sandpaper is likewise required for smoothing out any rough areas.
Preparing the Surface Area
Prior to starting the drywall setup process, it is crucial to appropriately prepare the surface area to guarantee a smooth and resilient surface. The surface preparation plays a significant function in the overall high quality and longevity of the drywall installation.The primary step in preparing the surface is to eliminate any kind of existing wall treatments, such as wallpaper or paint - drywall Edmonton. This can be done making use of a chemical or a scraper pole dancer, depending on the sort of covering. It is essential to make sure that the surface area is cost-free and clean from any debris or loose products that might impact the attachment of the drywall
:max_bytes(150000):strip_icc()/HangingDrywall-8aa3cdf963c2450596c4f9a7e56a1505.jpg)
As soon as the surface is clean and fixed, it is advised to prime the surface before installing the drywall. Priming helps to produce a consistent surface area, boosts the attachment of the drywall, and boosts the total surface.
Reducing and measuring Drywall
Properly reducing and gauging drywall is an important step in accomplishing a flawless surface, guaranteeing that the installment procedure perfectly continues from the surface prep work. Prior to cutting, it is vital to determine the dimensions of the location where the drywall will certainly be mounted.As soon as the dimensions have been taken, it is time to reduce the drywall. After the drywall has been snapped, make use of the energy blade to reduce through the continuing to be paper backing.
When cutting about openings, such as electric outlets or light switches, it is necessary to make accurate cuts. Begin by measuring the area of the opening on the drywall and mark it with a pencil. Then, using a keyhole saw or a drywall saw, meticulously reduced along the marked line. Take your time and ensure to stay within the marked area to make certain a exact and clean cut.
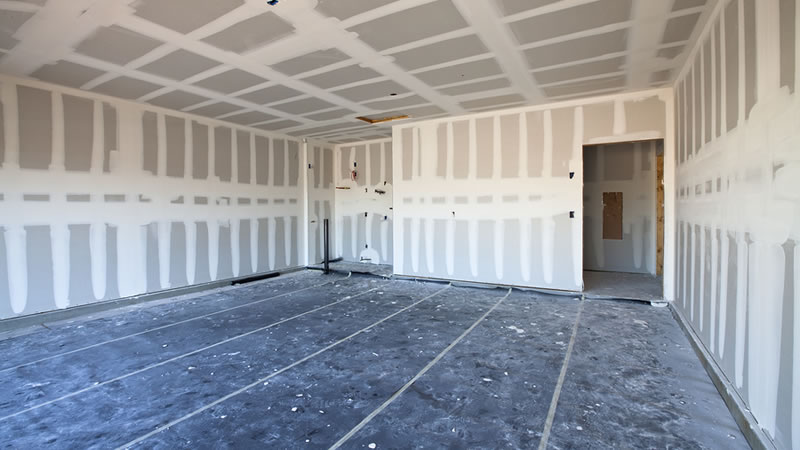
Setting Up and Protecting Drywall
Reliable setup and secure add-on are vital aspects of properly taking care of and placing drywall for a smooth coating. Once the drywall panels have been accurately determined and cut, they require to be installed and drywall installation securely fastened to the mounting participants. Before installment, it is necessary to guarantee that the framing is straight, degree, and without any kind of obstructions.To begin the setup procedure, the first panel needs to be placed on the base, with the tapered edges encountering up. The panel should be pressed securely versus the framing, making certain a limited fit. To safeguard the drywall to the framing, screws or nails need to be made use of. Screws are typically suggested due to their superior holding power and reduced risk of popping. They must be driven in at the center of the mounting members, roughly 16 inches apart.
To achieve a smooth finish, joint compound can be used to cover the screws and joints. Proper installation and protected attachment of drywall are necessary for achieving a perfect finish and making certain the durability and resilience of the wall surfaces or ceilings.
Ending Up Techniques and Tips
To attain a perfect finish, it is essential to grasp the proper strategies and suggestions for ending up drywall installment. Finishing drywall includes a series of actions that consist of joint taping, mudding, sanding, and applying a final coat of substance. These methods require precision and attention to information to ensure a smooth and seamless surface area.One essential idea is to use multiple slim coats of joint substance rather than one thick layer. This helps to minimize the danger of cracking and enables better control over the drying process. It is additionally important to feather the sides of each coat to develop a progressive transition and stay clear of visible joints.
Correct sanding is another vital step in accomplishing a flawless coating. Start with a coarse-grit sandpaper to smooth out any type of rough locations or ridges, and afterwards gradually transfer to finer-grit sandpaper for a smooth and even surface. Be sure to cleanse the wall surfaces thoroughly after sanding to remove any dust or particles prior to using the final layer of substance.
When using the last coat, referred to as the skim coat, it is essential to utilize a large putty knife or trowel to produce a slim and even layer. This will certainly help to complete any imperfections and produce a smooth, seamless finish. After using the skim coat, gently sand the surface to eliminate any type of imperfections and develop an ideal canvas for painting or wallpapering.
Conclusion
In final thought, complying with the specialist guide to drywall installation can help make certain a flawless surface. Additionally, using finishing suggestions and methods can even more improve the total look of the drywall.Insulation and Finishing Devices: Joint compound, a taping knife, and a corner tool are used for taping and completing the seams between drywall panels.Effectively determining and cutting drywall is a crucial step in accomplishing a remarkable surface, ensuring that the setup process flawlessly proceeds from the surface area prep work. drywall repair. Proper setup and protected add-on of drywall are vital for attaining a remarkable surface and making sure the longevity and durability of the ceilings or wall surfaces
To accomplish a perfect surface, it is crucial to understand the proper strategies and tips for completing drywall installment.In conclusion, complying with the expert overview to drywall setup can help guarantee a perfect surface.
Report this wiki page